Why You’ll Love This Recipe
- No-Bake: A hassle-free dessert that skips the oven.
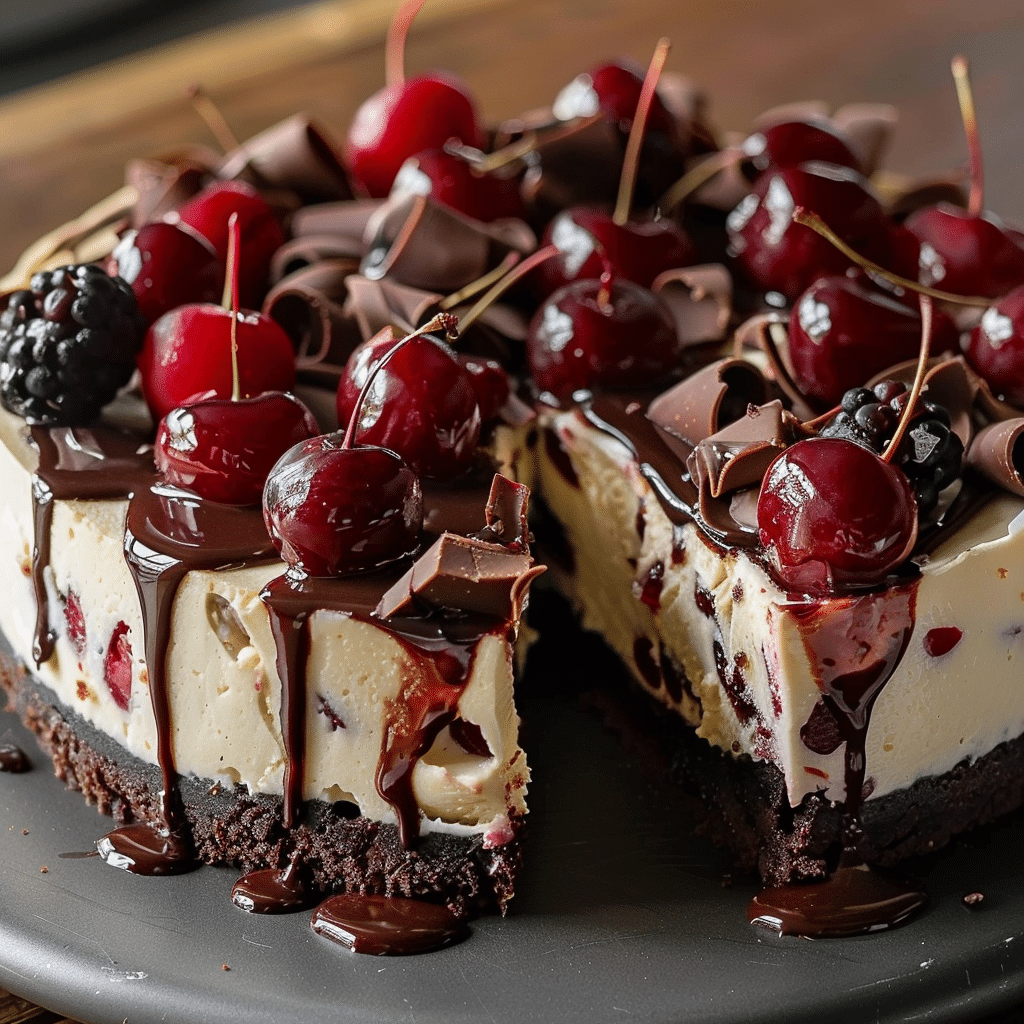
- Decadent Layers: Each bite offers the perfect blend of creamy cheesecake, rich chocolate, and sweet cherries.
- Customizable: Add your favorite toppings to make it uniquely yours.
- Perfect for Any Occasion: A show-stopping dessert for celebrations, potlucks, or date nights.
Ingredients
(Tip: You’ll find the full list of ingredients and measurements in the recipe card below.)
For the Cheesecake:
- 24 ounces cream cheese, softened
- 3/4 cup granulated sugar
- 1 teaspoon vanilla extract
- 1 cup whipped cream
For the Cherry Topping:
- 1 (21-ounce) can cherry pie filling
Optional Garnish:
- Additional whipped cream
- Chocolate shavings
Directions
- Prepare the Crust: Combine chocolate cookie crumbs with melted butter. Press the mixture into the bottom of a springform pan and chill to set.
- Melt the Chocolate: Melt dark chocolate until smooth, then spread it evenly over the crust. Chill again until the chocolate hardens.
- Prepare the Cheesecake Filling: In a large mixing bowl, beat cream cheese, sugar, and vanilla extract until creamy. Gently fold in the whipped cream.
- Layer the Cheesecake: Spread half of the cheesecake filling over the chilled chocolate layer. Top with half of the cherry pie filling. Repeat these layers for a stunning visual effect.
- Chill and Set: Cover the cheesecake and refrigerate overnight to allow it to set completely.
- Garnish and Serve: Before serving, add dollops of whipped cream and sprinkle chocolate shavings on top for a beautiful finish.
Servings and Timing
- Servings: 10-12 slices
- Preparation Time: 20 minutes
- Chilling Time: Overnight
Variations
- Crust Alternatives: Swap chocolate cookie crumbs with graham crackers or vanilla wafers for a different flavor profile.
- Fruit Toppings: Substitute cherry pie filling with blueberry, raspberry, or strawberry for a fresh twist.
- Chocolate Options: Use white chocolate or milk chocolate instead of dark chocolate for a sweeter taste.
- Dairy-Free: Replace cream cheese and whipped cream with dairy-free alternatives for a vegan version.
Storage/Reheating
- Storage: Store the cheesecake in an airtight container in the refrigerator for up to 5 days.
- Freezing: Freeze the cheesecake for up to 3 months. Wrap it tightly in plastic wrap and aluminum foil to prevent freezer burn. Thaw overnight in the refrigerator before serving.
- Reheating: This dessert is best served cold, so reheating is not necessary.
FAQs
1. Can I make this cheesecake ahead of time?
Yes, this cheesecake can be made a day or two in advance. Just store it in the refrigerator until ready to serve.
2. Do I need a springform pan?
A springform pan is ideal for easy removal, but you can use a regular pan lined with parchment paper.
3. Can I use homemade whipped cream?
Absolutely! Homemade whipped cream adds a fresh, rich flavor.
4. Is this recipe gluten-free?
It can be made gluten-free by using gluten-free cookie crumbs for the crust.
5. Can I add other layers?
Yes, you can add layers like a caramel drizzle or nuts for added texture and flavor.
6. How do I prevent the cheesecake from being too soft?
Ensure the cream cheese is properly softened and chill the cheesecake for the recommended time.
7. Can I use low-fat cream cheese?
Yes, but it may affect the texture and creaminess of the cheesecake.
8. How do I melt chocolate without burning it?
Use a double boiler or microwave it in short intervals, stirring between each.
9. Can I make mini cheesecakes with this recipe?
Yes, use a muffin tin lined with cupcake liners for individual portions.
10. How do I remove the cheesecake from the springform pan?
Run a knife around the edge before releasing the springform to ensure clean edges.
Conclusion
This cherry chocolate cheesecake is a delightful blend of creamy, fruity, and chocolatey goodness. Easy to make and perfect for any occasion, it’s a dessert that never fails to impress. Try it out and savor each decadent bite!

Decadent Cherry Chocolate Cheesecake Recipe
- Total Time: 8+ hours (including chilling)
- Yield: 10-12 slices
- Diet: Vegetarian
Description
Indulge in the ultimate no-bake cherry chocolate cheesecake, a creamy dessert layered with rich chocolate, velvety cream cheese filling, and a luscious cherry topping. This show-stopping treat is perfect for special occasions, potlucks, or simply satisfying your sweet tooth!
Ingredients
- For the Crust:
- 2 cups chocolate cookie crumbs
- 1/2 cup melted butter
- For the Cheesecake:
- 24 ounces cream cheese, softened
- 3/4 cup granulated sugar
- 1 teaspoon vanilla extract
- 1 cup whipped cream
- For the Cherry Topping:
- 1 (21-ounce) can cherry pie filling
- Optional Garnish:
- Whipped cream
- Chocolate shavings
Instructions
- Prepare the Crust:
- Mix chocolate cookie crumbs and melted butter. Press into the bottom of a springform pan and refrigerate to set.
- Melt the Chocolate:
- Melt dark chocolate until smooth and spread it over the chilled crust. Return to the refrigerator to harden.
- Prepare the Cheesecake Filling:
- In a mixing bowl, beat cream cheese, sugar, and vanilla extract until smooth. Gently fold in whipped cream.
- Assemble the Cheesecake:
- Spread half of the cheesecake filling over the chocolate layer. Add half of the cherry pie filling on top. Repeat layers.
- Chill:
- Cover the cheesecake and refrigerate overnight to set.
- Garnish and Serve:
- Before serving, top with whipped cream and chocolate shavings for a decorative finish.
Notes
- For a gluten-free version, use gluten-free cookie crumbs.
- Customize by using different pie fillings, such as blueberry or strawberry.
- Make individual servings by layering in mason jars or a muffin tin.
- Prep Time: 20 minutes
- Category: Dessert
- Method: No-Bake
- Cuisine: American

