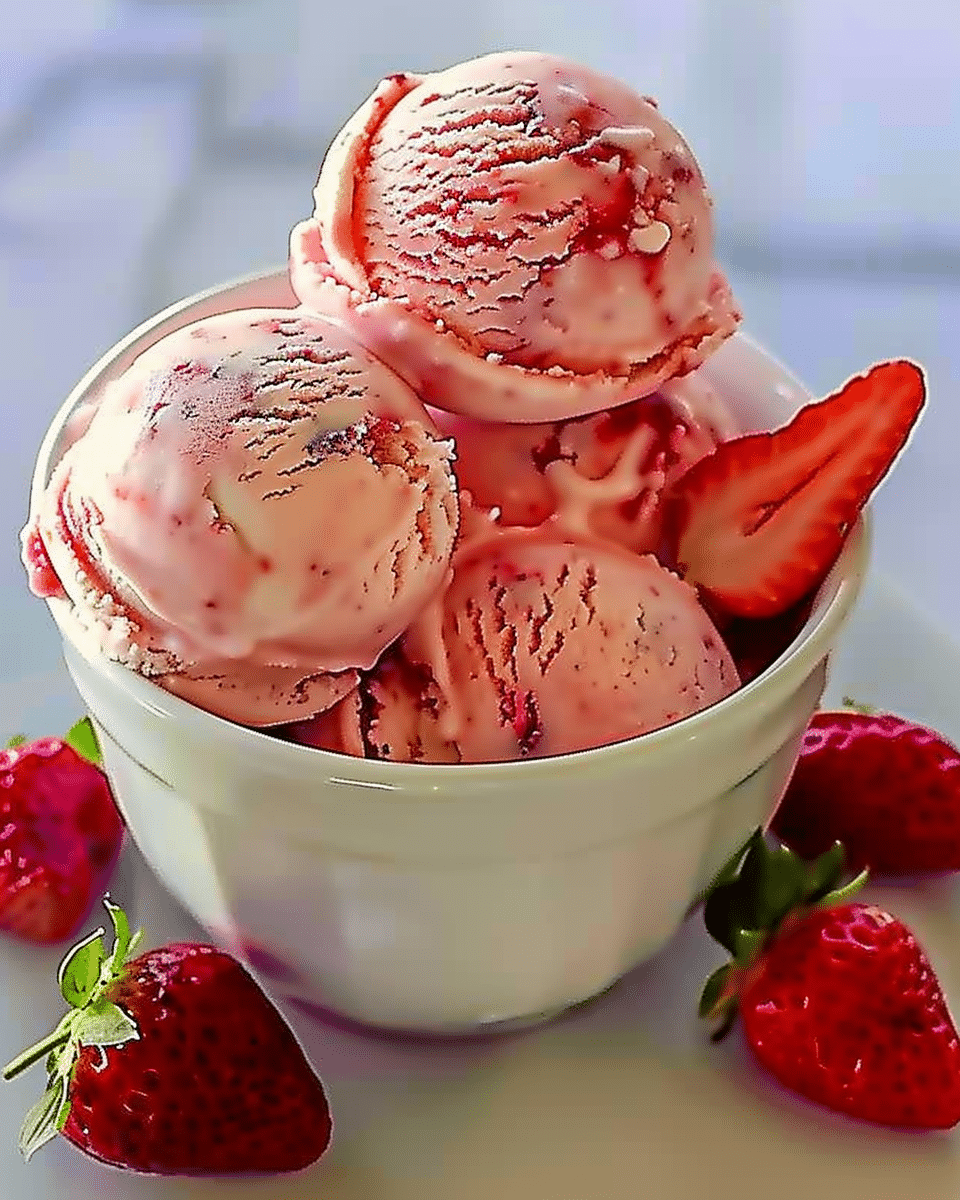
Why You’ll Love This Recipe
This Strawberry Vanilla Bean Ice Cream is a luxurious dessert that combines the rich flavors of fresh strawberries and aromatic vanilla bean. The creamy base offers a smooth, indulgent texture that melts in your mouth, while the strawberries provide a burst of natural sweetness. Unlike store-bought ice creams, this homemade version is made with high-quality ingredients, giving you full control over the flavor and texture. It’s simple to make, and the results are absolutely worth it.
Ingredients
(Tip: You’ll find the full list of ingredients and measurements in the recipe card below.)
For the Ice Cream Base:
- 2 cups fresh strawberries, diced
- ½ cup granulated sugar (for the strawberries)
- 1 vanilla bean
- 2 cups heavy cream
- 1 cup whole milk
- ½ cup granulated sugar (for the cream mixture)
- 4 large egg yolks
- 1 tsp vanilla extract
Directions
-
Prepare the Strawberries: In a medium bowl, combine the diced strawberries with ½ cup of granulated sugar. Toss to coat the strawberries evenly and let them sit for about 30 minutes to release their juices. Once the strawberries have softened, mash them lightly with a fork or potato masher. Set aside.
-
Make the Vanilla Bean Custard: In a saucepan, combine the heavy cream, whole milk, and ½ cup of granulated sugar. Split the vanilla bean lengthwise, scrape out the seeds, and add both the seeds and the pod to the saucepan. Heat the mixture over medium heat until it is hot but not boiling. Remove from the heat once it reaches this point.
-
Temper the Egg Yolks: In a separate bowl, whisk the egg yolks until smooth. Gradually add a small amount of the hot cream mixture to the egg yolks to temper them, whisking constantly to avoid curdling. Once tempered, pour the egg yolk mixture back into the saucepan with the remaining cream mixture.
-
Cook the Custard: Return the saucepan to low heat and cook the custard, stirring constantly with a wooden spoon or silicone spatula until it thickens and coats the back of the spoon. This should take about 5-7 minutes. Be careful not to overheat, as the eggs can scramble.
-
Cool and Combine: Remove the saucepan from the heat and strain the custard through a fine mesh sieve to remove the vanilla pod. Let the custard cool to room temperature before refrigerating for at least 2 hours or overnight for the best results.
-
Mix the Strawberries and Custard: Once the custard has chilled, mix in the mashed strawberries and vanilla extract. Stir until fully incorporated.
-
Churn the Ice Cream: Pour the mixture into your ice cream maker and churn according to the manufacturer’s instructions. This process typically takes 20-30 minutes.
-
Freeze and Serve: Transfer the churned ice cream to an airtight container and freeze for an additional 2-4 hours, or until firm. Once ready, scoop and enjoy!
Servings and Timing
- Servings: This recipe yields about 6-8 servings of ice cream, depending on portion sizes.
- Prep Time: 30 minutes (excluding chilling and freezing time)
- Chill Time: At least 2 hours for the custard
- Churn Time: 20-30 minutes in the ice cream maker
- Freezing Time: 2-4 hours until firm
Variations
- Vegan Version: Use coconut milk or almond milk in place of whole milk, and substitute the heavy cream with coconut cream or a non-dairy cream alternative. Use an egg replacer or skip the eggs for a vegan-friendly version.
- Berry Blend: You can experiment with different berries like raspberries or blueberries for a different fruity flavor combination.
- Chocolate Chip Swirl: Add mini chocolate chips or chunks during the last few minutes of churning for a chocolatey twist.
- Minty Freshness: Add a few drops of mint extract for a refreshing mint-strawberry ice cream combination.
Storage/Reheating
- Storage: Store the ice cream in an airtight container in the freezer for up to 2 weeks. After that, it may start to lose its texture and flavor.
- Reheating: Ice cream does not require reheating. If it’s too hard to scoop, let it sit at room temperature for 5-10 minutes to soften before serving.
FAQs
1. Can I use frozen strawberries instead of fresh?
Yes, you can use frozen strawberries. Just make sure to thaw them before using, and mash them to release the juices.
2. Do I need an ice cream maker for this recipe?
An ice cream maker makes the process much easier, but you can still make this ice cream by hand. After combining the custard and strawberry mixture, pour it into a shallow container and freeze, stirring every 30 minutes for the first 2 hours to break up any ice crystals.
3. How can I make this recipe without eggs?
You can omit the eggs and use a no-egg ice cream base, but you might need to adjust the cream-to-milk ratio slightly to maintain a creamy texture.
4. What is the best way to store homemade ice cream?
Store homemade ice cream in an airtight container in the freezer. Be sure to press a piece of plastic wrap or wax paper directly onto the surface of the ice cream before sealing the container to prevent ice crystals from forming.
5. Can I make this ice cream without vanilla beans?
Yes, you can substitute the vanilla bean with 1 tablespoon of pure vanilla extract, though the flavor may not be as rich and aromatic as with the beans.
6. How long does it take for homemade ice cream to freeze completely?
Homemade ice cream typically takes 2-4 hours to fully freeze, depending on the texture you’re aiming for.
7. Can I add mix-ins like nuts or candy?
Yes, you can add mix-ins such as crushed nuts, chocolate chunks, or candy pieces during the last few minutes of churning.
8. Is this recipe gluten-free?
Yes, this recipe is naturally gluten-free, as none of the ingredients contain gluten.
9. Can I use a different sweetener instead of granulated sugar?
Yes, you can experiment with alternative sweeteners like honey, maple syrup, or stevia, but be sure to adjust the quantities for the right sweetness level.
10. Can I make this recipe ahead of time?
Yes, you can make the ice cream a day or two in advance. Just store it in the freezer until you’re ready to serve.
Conclusion
Strawberry Vanilla Bean Ice Cream is the perfect indulgent dessert for those hot summer days. With its creamy texture, rich vanilla flavor, and sweet burst of strawberries, this homemade treat is sure to become a family favorite. Whether you’re looking for a refreshing snack or a decadent dessert, this ice cream is a simple yet luxurious way to enjoy the flavors of summer.
