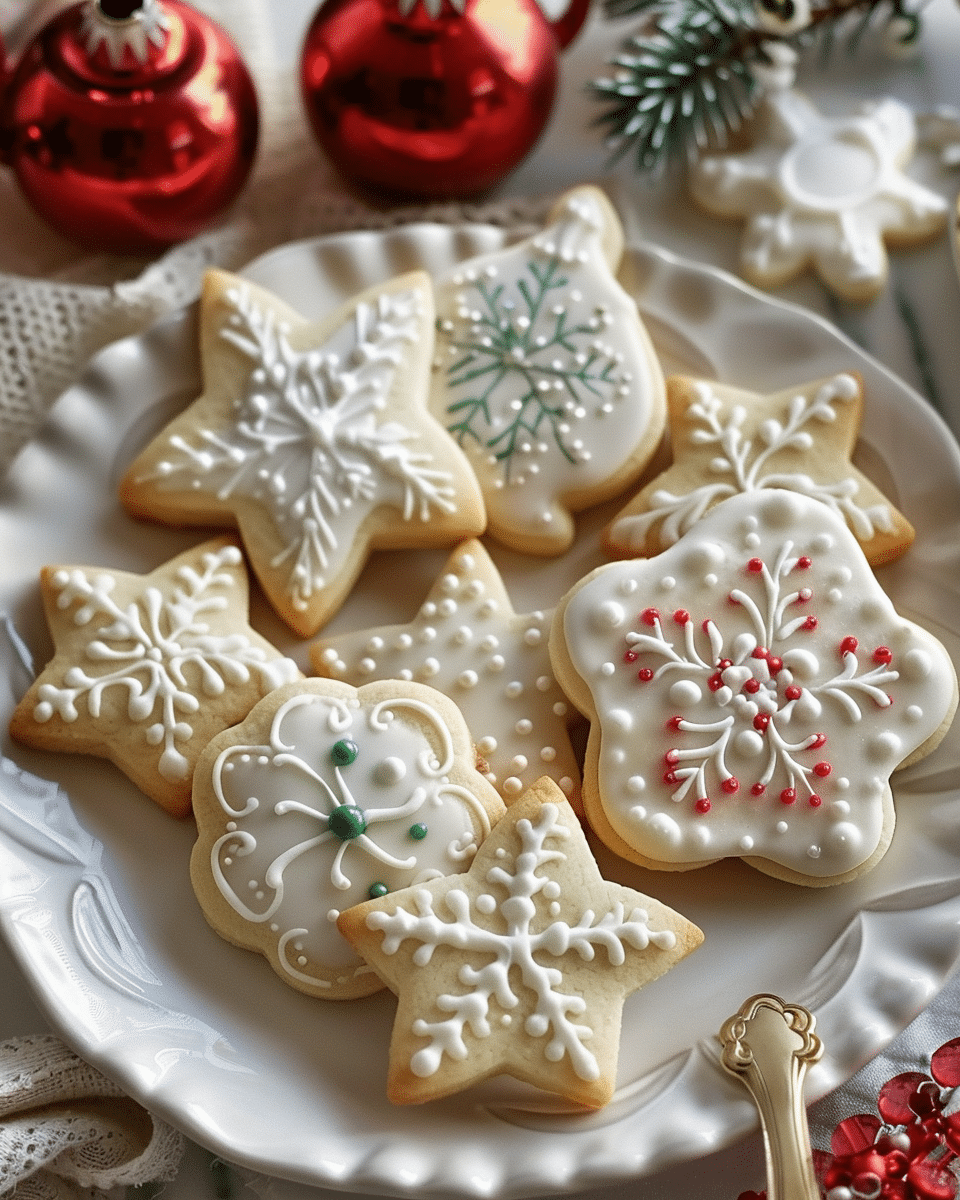
Why You’ll Love This Recipe
This recipe is a classic favorite for a reason! The soft, chewy texture of the cookies combined with the sweet, customizable icing makes for a fun and delicious treat. Whether you’re baking for a holiday or a special occasion, decorating these cookies is a fun activity for kids and adults alike. Plus, the recipe is simple, straightforward, and the cookies store well for a few days, making them perfect for gifting or enjoying later.
Ingredients
For the Cookies:
- 1 1/2 cups butter, softened
- 2 cups white sugar
- 4 large eggs
- 1 teaspoon vanilla extract
- 5 cups all-purpose flour
- 2 teaspoons baking powder
- 1 teaspoon salt
For the Icing:
- 2 cups powdered sugar
- 2-4 tablespoons milk (start with 2 and adjust as needed)
- 1 tablespoon honey or light corn syrup
- 1 teaspoon vanilla extract
- Food coloring (optional)
(Tip: You’ll find the full list of ingredients and measurements in the recipe card below.)
Directions
-
Prepare the Dough: In a large mixing bowl, cream together the softened butter and sugar until smooth. Beat in the eggs and vanilla extract. Gradually add the flour, baking powder, and salt, mixing until fully incorporated.
-
Chill: Cover the dough and chill for at least 1 hour or overnight. For convenience, you can freeze half of the batch to use later if desired.
-
Roll and Cut: Preheat the oven to 400°F (200°C). Roll out the dough on a floured surface to about 1/4-inch thickness. Use cookie cutters to cut the dough into your desired shapes.
-
Bake: Arrange the cookies on parchment-lined baking sheets and bake for 6-7 minutes, or until the edges are just starting to turn golden. Let the cookies cool completely before decorating.
-
Make the Icing: In a medium bowl, mix together the powdered sugar, 2 tablespoons of milk, honey or corn syrup, and vanilla extract. Add more milk, one tablespoon at a time, until the icing reaches your desired spreading consistency. It should be thick enough to stay on the cookie without dripping. Divide the icing into bowls and add food coloring if desired.
-
Decorate: Spread or pipe the icing onto the cooled cookies. Allow the icing to set completely before storing the cookies.
Servings and Timing
- Prep Time: 20 minutes
- Chilling Time: 1 hour
- Cooking Time: 7 minutes
- Total Time: 1 hour 27 minutes
- Servings: Makes approximately 36 cookies
- Calories: 140 kcal per cookie
Variations
- Add Sprinkles: Before the icing sets, add colorful sprinkles or edible glitter for extra flair.
- Flavor Variations: For a twist, you can add a bit of almond extract to the dough or the icing.
- Shape Customization: These cookies are perfect for cutting into fun shapes. Use heart-shaped, star-shaped, or even themed cookie cutters for different occasions.
- Vegan Option: Substitute butter for vegan butter and eggs for a flax or chia egg replacement.
Storage/Reheating
- Store the decorated cookies in an airtight container at room temperature for up to 5 days.
- To store the dough, wrap it tightly in plastic wrap and refrigerate for up to 3 days or freeze for up to 3 months. When ready to use, let it thaw in the refrigerator before rolling and cutting.
- If you have leftover icing, it can be stored in an airtight container in the fridge for up to a week. Just rewhisk it before using.
FAQs
1. Can I make these cookies in advance?
Yes! You can prepare the dough in advance and refrigerate it for up to 3 days or freeze it for up to 3 months.
2. Can I use margarine instead of butter?
While margarine can be used, butter provides the best flavor and texture for these sugar cookies.
3. Can I make the icing thinner or thicker?
Yes, adjust the consistency of the icing by adding more or less milk, depending on whether you prefer a thicker or thinner icing for spreading or piping.
4. Can I freeze the cookies after baking?
Yes, you can freeze the cookies before decorating. Just let them cool completely, then place them in an airtight container or freezer bag for up to 3 months.
5. How do I prevent the cookies from spreading too much while baking?
Ensure that the dough is chilled before rolling it out, as this helps the cookies maintain their shape during baking.
6. Can I make these cookies without icing?
Absolutely! These sugar cookies are just as delicious on their own, without icing. Feel free to enjoy them plain or with a dusting of powdered sugar.
7. How can I store the decorated cookies?
Store decorated cookies in an airtight container at room temperature for up to 5 days. If you need to stack them, place parchment paper between layers to prevent the icing from sticking.
8. Can I use a hand mixer instead of a stand mixer?
Yes, a hand mixer will work just fine for creaming the butter and sugar and mixing the dough.
9. Can I add chocolate chips or other mix-ins to the dough?
Yes! Feel free to add chocolate chips, sprinkles, or other small mix-ins to the dough for extra flavor and texture.
10. How do I get smooth, even icing?
To achieve smooth icing, use an offset spatula or a butter knife to spread the icing evenly on the cookies. Start from the center and work your way to the edges.
Conclusion
These Rolled Sugar Cookies are a delightful treat that’s easy to make and even easier to customize. Whether you’re baking for a special occasion or just craving a sweet snack, this recipe is sure to become a favorite in your kitchen. With a soft, buttery cookie base and a sweet, colorful icing, they’re perfect for both kids and adults alike. Enjoy making and decorating these cookies with your loved ones, and don’t forget to save a few for later!
