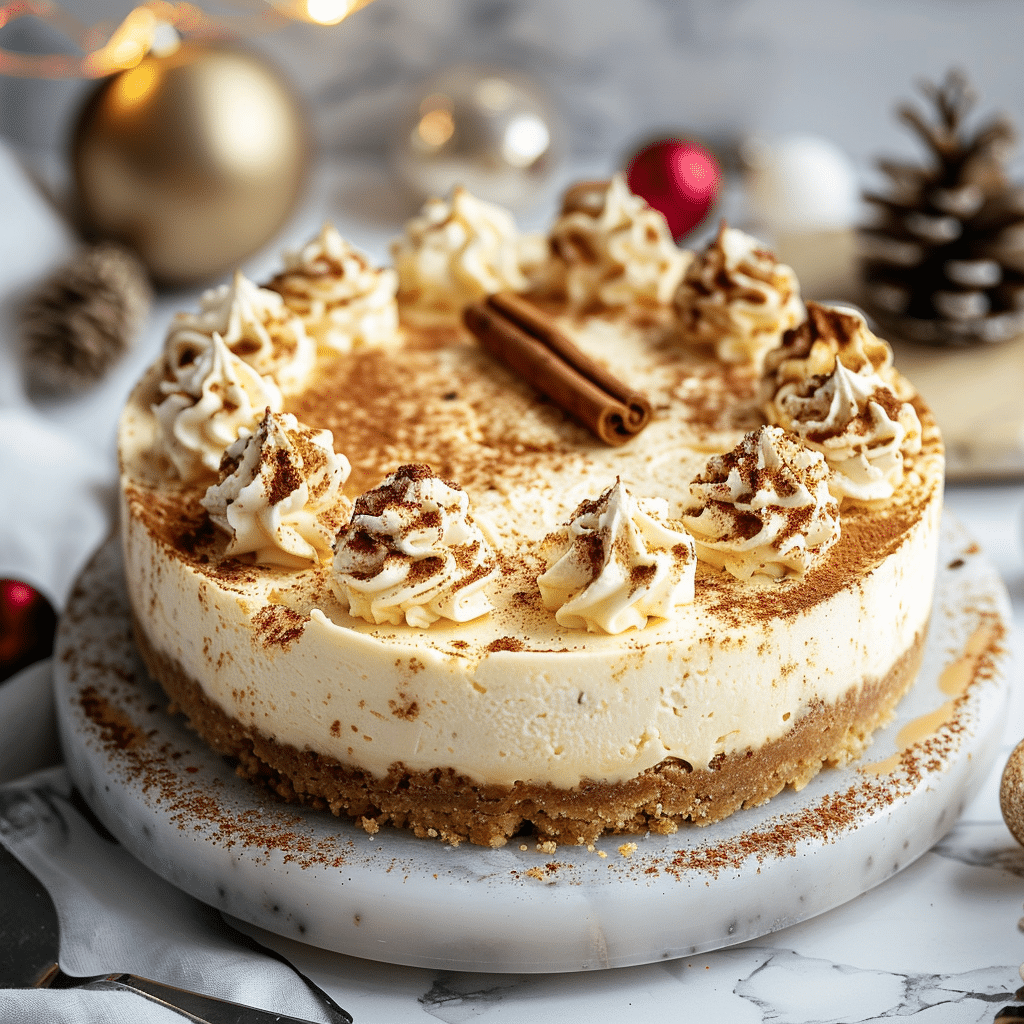
Why You’ll Love This Recipe
This Christmas Tree Cheesecake combines the rich, smooth texture of a classic cheesecake with a playful and festive presentation. The no-bake approach makes it convenient for holiday preparations, and the decorative aspect allows for creative expression, making it a fun project to share with family or friends.
Ingredients
(Tip: You’ll find the full list of ingredients and measurements in the recipe card below.)
- 2 cups vanilla wafer crumbs
- 1/2 cup unsalted butter, melted
- 16 oz cream cheese, softened
- 1 cup powdered sugar
- 1 tsp vanilla extract
- 1 cup whipped cream, for topping
- Green food coloring
- Sprinkles or candies, for decorating
Directions
- Prepare the Crust:
- In a bowl, combine the vanilla wafer crumbs and melted butter until the mixture resembles wet sand.
- Press the mixture firmly into the bottom of a 9-inch springform pan to form an even crust.
- Prepare the Filling:
- In a large bowl, beat the softened cream cheese until smooth and creamy.
- Gradually add the powdered sugar and continue beating until well combined.
- Mix in the vanilla extract.
- Assemble the Cheesecake:
- Pour the cream cheese mixture over the prepared crust, spreading it evenly.
- Smooth the top with a spatula to create a flat surface.
- Chill:
- Refrigerate the cheesecake for at least 4 hours, or preferably overnight, until it is firm and set.
- Decorate:
- Tint the whipped cream with green food coloring to achieve the desired shade for your “tree.”
- Transfer the green whipped cream to a piping bag fitted with a star tip.
- Pipe the whipped cream onto the cheesecake in the shape of a Christmas tree.
- Decorate the tree with sprinkles or small candies to resemble ornaments.
- Serve:
- Carefully remove the cheesecake from the springform pan.
- Slice and serve chilled.
Servings and Timing
- Servings: This recipe yields approximately 8 servings.
- Preparation Time: 20 minutes
- Chilling Time: At least 4 hours (or overnight)
Variations
- Flavor Twist: Incorporate a teaspoon of peppermint extract into the filling for a minty holiday flavor.
- Crust Options: Substitute the vanilla wafer crumbs with graham cracker crumbs or chocolate cookie crumbs for a different base flavor.
- Mini Cheesecakes: Create individual servings by preparing the cheesecake in a muffin tin lined with cupcake liners.
Storage/Reheating
- Storage: Store the cheesecake in an airtight container in the refrigerator for up to 3 days.
- Freezing: To freeze, place the undecorated cheesecake in the freezer until firm, then wrap it securely in plastic wrap and aluminum foil. Freeze for up to 1 month. Thaw in the refrigerator overnight before decorating and serving.
FAQs
How far in advance can I make this cheesecake?
You can prepare this cheesecake up to 2 days in advance. Keep it refrigerated and add the whipped cream decorations just before serving for the best presentation.
Can I use store-bought whipped cream for the decoration?
Yes, store-bought whipped cream can be used. However, homemade whipped cream tends to hold its shape better and can be tinted with food coloring more easily.
What if I don’t have a piping bag?
If you don’t have a piping bag, you can use a zip-top plastic bag with a small corner cut off to pipe the whipped cream.
Can I add food coloring to the cheesecake filling?
Yes, you can add food coloring to the filling if you wish to have a colored cheesecake. Ensure to mix it evenly to achieve a uniform color.
How do I prevent the crust from crumbling when serving?
Press the crust mixture firmly into the pan to ensure it holds together. Using a sharp knife to cut the cheesecake can also help maintain clean slices.
Can I use low-fat cream cheese?
Yes, low-fat cream cheese can be used, but it may slightly alter the texture and richness of the cheesecake.
What type of sprinkles work best for decoration?
Nonpareils or small, colorful sprinkles work well to resemble ornaments on the Christmas tree.
How do I remove the cheesecake from the pan without damaging it?
Run a warm knife around the edge of the cheesecake before releasing the springform pan to help separate it cleanly.
Can I make this cheesecake gluten-free?
Yes, by using gluten-free cookies for the crust, you can make this cheesecake gluten-free.
Is it possible to make this cheesecake dairy-free?
Substituting dairy-free alternatives for the cream cheese and butter can make this cheesecake suitable for a dairy-free diet. Ensure all ingredients used are dairy-free.
Conclusion
This festive Christmas Tree Cheesecake is a delightful addition to your holiday dessert table. Its creamy texture and charming decoration make it a treat that’s as enjoyable to make as it is to eat. Whether you’re entertaining guests or enjoying a cozy family gathering, this cheesecake is sure to bring joy and festive cheer to all.

Eggnog Cheesecake
- Total Time: 4 hours 20 minutes (includes chilling)
- Yield: 8 servings
- Diet: Vegetarian
Description
Christmas Tree Cheesecake – A no-bake vanilla cheesecake that’s as festive as it is delicious! With a buttery vanilla wafer crust, creamy filling, and green whipped cream decoration resembling a Christmas tree, this dessert is a holiday showstopper. Perfect for adding whimsy and charm to your celebrations.
Ingredients
Ingredients:
- For the crust:
- 2 cups vanilla wafer crumbs
- 1/2 cup unsalted butter, melted
- For the filling:
- 16 oz cream cheese, softened
- 1 cup powdered sugar
- 1 tsp vanilla extract
- For decoration:
- 1 cup whipped cream, for topping
- Green food coloring
- Sprinkles or candies, for decorating
Instructions
- Prepare the Crust:
- Mix vanilla wafer crumbs and melted butter until combined.
- Press mixture into the bottom of a 9-inch springform pan.
- Prepare the Filling:
- Beat cream cheese until smooth. Gradually add powdered sugar and vanilla extract. Mix well.
- Assemble:
- Spread the cream cheese mixture evenly over the crust. Smooth the top.
- Chill:
- Refrigerate for at least 4 hours or overnight until firm.
- Decorate:
- Tint whipped cream with green food coloring. Pipe into a tree shape and decorate with sprinkles or candies.
- Serve:
- Remove from pan, slice, and serve chilled.
Notes
- For a minty twist, add 1 tsp of peppermint extract to the filling.
- Substitute the crust with graham crackers or chocolate cookies for a different base.
- Prep Time: 20 minutes
- Cook Time: No cooking required
- Category: Dessert
- Method: No-Bake
- Cuisine: American

