Why You’ll Love This Recipe
- No baking required—ready in just 15 minutes!
- Combines the flavors of banana pudding and cheesecake in a fun, handheld cone.
- Perfect for parties, BBQs, and special occasions.
- Customizable with different toppings like caramel drizzle or chocolate shavings.
- A great make-ahead treat for easy serving.
Ingredients
(Tip: You’ll find the full list of ingredients and measurements in the recipe card below.)
For the Cheesecake Filling:
- 8 oz cream cheese, softened
- 1/2 cup powdered sugar
- 1/2 teaspoon vanilla extract
- 1/2 cup heavy cream, whipped
For the Banana Pudding Layer:
- 1 box (3.4 oz) instant banana pudding mix
- 1 1/2 cups cold milk
- 1 banana, sliced
For Assembly:
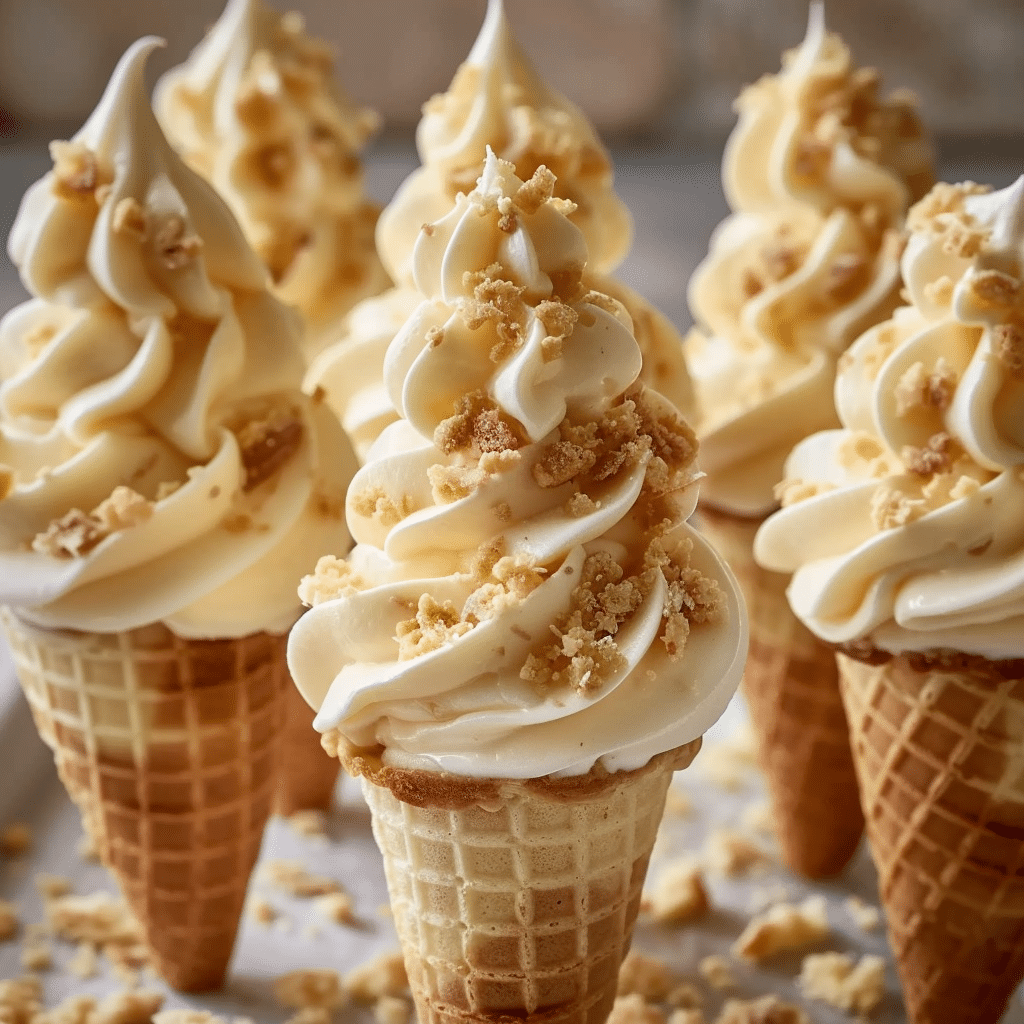
- 6 waffle cones
- 1/2 cup crushed vanilla wafers
- Whipped cream (for topping)
- Caramel drizzle (optional)
- Extra vanilla wafers and banana slices for garnish
Directions
- Prepare the Cheesecake Filling: In a mixing bowl, beat the softened cream cheese, powdered sugar, and vanilla extract until smooth. Gently fold in the whipped heavy cream until fully combined. Set aside.
- Make the Banana Pudding: In another bowl, whisk together the banana pudding mix and cold milk for about 2 minutes until it thickens. Let it sit for 5 minutes to set.
- Assemble the Cones: Spoon or pipe a layer of cheesecake filling into each waffle cone. Add a layer of banana pudding and a few banana slices. Repeat the layers until the cone is filled.
- Garnish: Top each cone with whipped cream, a sprinkle of crushed vanilla wafers, and a drizzle of caramel if desired. Finish with a whole vanilla wafer and a banana slice on top.
- Serve immediately or refrigerate for up to 2 hours before serving for a chilled treat.
Servings and Timing
- Servings: 6 cones
- Prep Time: 15 minutes
- Total Time: 15 minutes
- Calories: Approximately 320 kcal per cone
Variations
- Chocolate Twist: Swap the vanilla wafers for crushed chocolate cookies for a banana-chocolate flavor.
- Peanut Butter Lovers: Drizzle peanut butter over the top for a banana-peanut butter combo.
- Strawberry Banana: Add chopped strawberries between the layers for a fruity twist.
- Gluten-Free Option: Use gluten-free waffle cones and vanilla wafers.
- Mini Cones: Use mini waffle cones for a bite-sized party-friendly version.
Storage/Reheating
- Storage: These cones are best enjoyed fresh, but you can refrigerate them for up to 2 hours before serving. Any longer, and the cones may become soggy.
- Make Ahead: You can prepare the cheesecake filling and banana pudding in advance and store them separately in the fridge for up to 24 hours. Fill the cones just before serving.
FAQs
1. Can I make these cones ahead of time?
Yes, but for the best texture, fill the cones just before serving to prevent sogginess.
2. What type of waffle cones should I use?
Regular waffle cones work great, but you can also use mini cones for smaller portions.
3. Can I use homemade banana pudding instead of instant?
Absolutely! Homemade banana pudding will add a richer flavor, though it takes a bit more time to prepare.
4. How do I keep the cones from getting soggy?
Assemble the cones just before serving or brush the inside of the cones with melted chocolate to create a moisture barrier.
5. Can I use a different pudding flavor?
Yes! Vanilla, chocolate, or even butterscotch pudding would work well in this recipe.
6. What toppings go well with these cones?
Caramel drizzle, chocolate shavings, crushed nuts, or even a maraschino cherry would make great toppings.
7. Can I make these dairy-free?
Yes, use dairy-free cream cheese, coconut whipped cream, and almond milk to make this recipe dairy-free.
8. Can I freeze the cheesecake filling?
Yes! You can freeze the cheesecake filling for up to a month and thaw it in the fridge before using.
9. What’s the best way to pipe the filling into the cones?
A piping bag with a large round tip makes filling the cones easier and neater.
10. How can I add more texture?
Try adding chopped nuts or a sprinkle of crushed graham crackers for extra crunch.
Conclusion
Banana Pudding Cheesecake Cones are a fun, easy, and delicious dessert that combines two classic flavors in a unique way. Whether you’re making them for a party, a summer treat, or just because you love banana pudding, these cones are sure to impress. Enjoy them fresh, and get creative with your favorite toppings!
Print
Banana Pudding Cheesecake Cones
- Total Time: 15 minutes
- Yield: 6 cones
Description
Banana Pudding Cheesecake Cones are a no-bake dessert that combines the rich flavors of cheesecake with the nostalgic taste of banana pudding—all served in a crispy waffle cone. Perfect for parties, summer gatherings, and quick sweet cravings, this easy dessert is customizable with fun toppings like caramel drizzle, chocolate shavings, or crushed vanilla wafers.
Ingredients
For the Cheesecake Filling:
- 8 oz cream cheese, softened
- 1/2 cup powdered sugar
- 1/2 teaspoon vanilla extract
- 1/2 cup heavy cream, whipped
For the Banana Pudding Layer:
- 1 box (3.4 oz) instant banana pudding mix
- 1 1/2 cups cold milk
- 1 banana, sliced
For Assembly:
- 6 waffle cones
- 1/2 cup crushed vanilla wafers
- Whipped cream (for topping)
- Caramel drizzle (optional)
- Extra vanilla wafers and banana slices for garnish
Instructions
1️⃣ Prepare the Cheesecake Filling:
- In a mixing bowl, beat the softened cream cheese, powdered sugar, and vanilla extract until smooth.
- Gently fold in the whipped heavy cream until fully combined. Set aside.
2️⃣ Make the Banana Pudding:
- In another bowl, whisk together the banana pudding mix and cold milk for about 2 minutes until it thickens.
- Let it sit for 5 minutes to set.
3️⃣ Assemble the Cones:
- Spoon or pipe a layer of cheesecake filling into each waffle cone.
- Add a layer of banana pudding and a few banana slices.
- Repeat the layers until the cone is filled.
4️⃣ Garnish:
- Top each cone with whipped cream, a sprinkle of crushed vanilla wafers, and a drizzle of caramel if desired.
- Finish with a whole vanilla wafer and a banana slice on top.
5️⃣ Serve immediately or refrigerate for up to 2 hours before serving for a chilled treat.
- Prep Time: 15 minutes
- Category: Dessert
