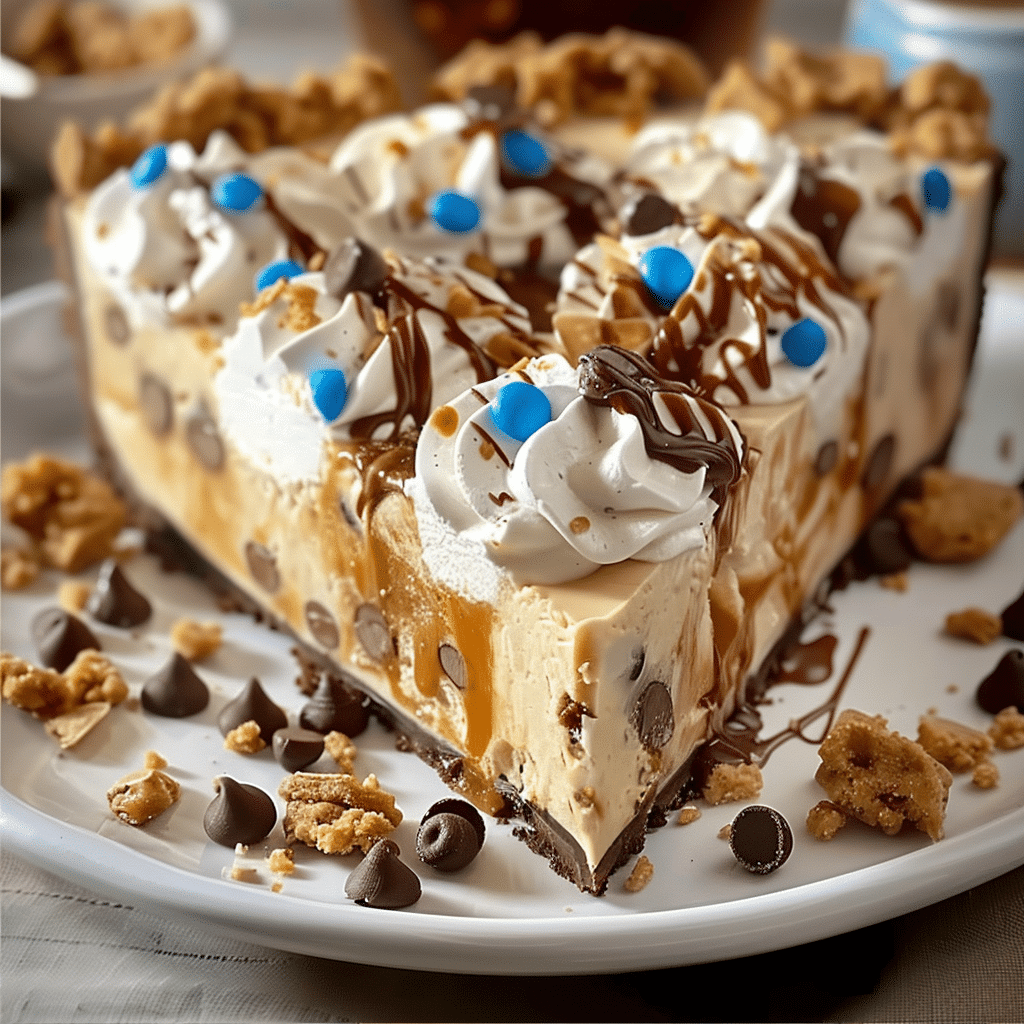
Why You’ll Love This Recipe
- Unique and Decadent: Combines a monster cookie crust with peanut butter cheesecake for a creative, over-the-top dessert.
- Loaded with Texture: The chewy crust, creamy filling, and crunchy mix-ins create a delightful combination.
- Perfect for Peanut Butter Fans: A dream dessert for anyone who loves peanut butter and chocolate.
- Crowd-Pleaser: A colorful and impressive dessert that’s guaranteed to be the star of any gathering.
Ingredients
(Tip: You’ll find the full list of ingredients and measurements in the recipe card below.)
For the Monster Cookie Crust:
- 1/2 cup unsalted butter, softened
- 1/2 cup brown sugar, packed
- 1/4 cup granulated sugar
- 1 large egg
- 1 tsp vanilla extract
- 1 cup creamy peanut butter
- 1 1/4 cups all-purpose flour
- 1/2 tsp baking soda
- 1/4 tsp salt
- 3/4 cup mini chocolate chips
- 3/4 cup M&Ms
For the Peanut Butter Cheesecake Filling:
- 16 oz cream cheese, softened
- 1 cup creamy peanut butter
- 3/4 cup powdered sugar
- 1 tsp vanilla extract
- 1 1/2 cups heavy cream, whipped to stiff peaks
For Topping:
- 1/2 cup M&Ms
- 1/2 cup mini chocolate chips
- Drizzle of melted chocolate (optional)
Directions
Prepare the Monster Cookie Crust:
- Preheat your oven to 350°F (175°C). Grease a 9-inch pie dish.
- In a large bowl, cream the softened butter, brown sugar, and granulated sugar until light and fluffy.
- Beat in the egg, vanilla extract, and peanut butter until smooth.
- In a separate bowl, whisk together the flour, baking soda, and salt. Gradually mix the dry ingredients into the wet ingredients.
- Fold in the mini chocolate chips and M&Ms.
- Press the cookie dough evenly into the prepared pie dish, covering the bottom and sides.
- Bake for 15-18 minutes, or until the edges are golden. Allow the crust to cool completely.
Make the Peanut Butter Cheesecake Filling:
- In a large bowl, beat the softened cream cheese and peanut butter until smooth.
- Add the powdered sugar and vanilla extract, mixing well.
- Gently fold in the whipped cream to create a light and fluffy filling.
Assemble the Pie:
- Spoon the peanut butter cheesecake filling into the cooled cookie crust, spreading it evenly.
- Sprinkle the top with additional M&Ms and mini chocolate chips. Drizzle with melted chocolate if desired.
Chill:
- Cover the pie and refrigerate for at least 4 hours, or until the filling is set.
Serve:
Slice and serve this luscious pie for a decadent treat that’s sure to impress!
Servings and Timing
- Servings: 10 slices
- Prep Time: 25 minutes
- Cook Time: 18 minutes
- Chill Time: 4 hours
- Total Time: Approximately 4 hours 45 minutes
Variations
- Nut-Free Version: Use sunflower seed butter instead of peanut butter and allergy-friendly chocolate candies.
- Oreo Twist: Substitute the monster cookie crust with a crushed Oreo crust for a chocolaty base.
- Extra Crunch: Add chopped peanuts or pretzels to the cheesecake filling for added texture.
- Different Mix-Ins: Swap the M&Ms and chocolate chips for Reese’s Pieces or white chocolate chips.
Storage/Reheating
- Storage: Keep the pie covered in the refrigerator for up to 5 days.
- Freezing: Freeze individual slices or the whole pie (wrapped tightly in plastic wrap and aluminum foil) for up to 2 months. Thaw overnight in the refrigerator before serving.
- Reheating: This dessert is best served chilled and does not require reheating.
FAQs
1. Can I make this pie ahead of time?
Yes! This pie can be made a day in advance and stored in the refrigerator until ready to serve.
2. Can I use natural peanut butter?
Yes, but the texture may vary slightly. Ensure the peanut butter is well-stirred and smooth before using.
3. What can I substitute for heavy cream?
Whipped topping (like Cool Whip) can be used as a shortcut, but it may alter the flavor slightly.
4. Can I make this gluten-free?
Yes! Use gluten-free all-purpose flour and ensure your mix-ins are certified gluten-free.
5. Can I use a store-bought cookie crust?
Absolutely. A pre-made crust can save time if you’re in a hurry.
6. How do I prevent the crust from sticking?
Grease your pie dish well, or use parchment paper to line it.
7. Can I use chunky peanut butter?
Yes, but the filling will have a slightly crunchy texture.
8. What can I use instead of cream cheese?
Mascarpone cheese can be a good substitute, though it’s less tangy.
9. Can I add caramel to this recipe?
Yes! Drizzle caramel sauce over the filling or mix it into the topping for extra sweetness.
10. What other toppings can I add?
Crushed candy bars, toffee bits, or a sprinkle of sea salt make excellent additions.
Conclusion
This Monster Cookie Peanut Butter Cheesecake Pie is a show-stopping dessert that combines the best of chewy, creamy, and crunchy textures. Perfect for peanut butter and chocolate lovers, this colorful pie is a hit at gatherings or as a special treat for your family. Its versatility and ease of preparation make it a must-try recipe for any dessert enthusiast. Give it a try, and watch it disappear slice by slice!

Monster Cookie Peanut Butter Cheesecake Pie
- Total Time: 4 hours 45 minutes
- Yield: 10 slices
- Diet: Vegetarian
Description
This Monster Cookie Peanut Butter Cheesecake Pie is a decadent dessert featuring a chewy cookie crust packed with M&Ms and chocolate chips, and a creamy peanut butter cheesecake filling. Perfect for special occasions or anytime you crave a wow-worthy treat!
Ingredients
For the Monster Cookie Crust:
- 1/2 cup unsalted butter, softened
- 1/2 cup brown sugar, packed
- 1/4 cup granulated sugar
- 1 large egg
- 1 tsp vanilla extract
- 1 cup creamy peanut butter
- 1 1/4 cups all-purpose flour
- 1/2 tsp baking soda
- 1/4 tsp salt
- 3/4 cup mini chocolate chips
- 3/4 cup M&Ms
For the Peanut Butter Cheesecake Filling:
- 16 oz cream cheese, softened
- 1 cup creamy peanut butter
- 3/4 cup powdered sugar
- 1 tsp vanilla extract
- 1 1/2 cups heavy cream, whipped to stiff peaks
For the Topping:
- 1/2 cup M&Ms
- 1/2 cup mini chocolate chips
- Drizzle of melted chocolate (optional)
Instructions
- Prepare the Monster Cookie Crust:
- Preheat the oven to 350°F (175°C) and grease a 9-inch pie dish.
- In a large bowl, cream the butter, brown sugar, and granulated sugar until light and fluffy.
- Mix in the egg, vanilla extract, and peanut butter until smooth.
- In a separate bowl, whisk together flour, baking soda, and salt. Gradually add the dry mixture to the wet ingredients.
- Fold in mini chocolate chips and M&Ms.
- Press the dough into the pie dish, covering the bottom and sides evenly.
- Bake for 15-18 minutes or until edges are golden. Let cool completely.
- Make the Peanut Butter Cheesecake Filling:
- Beat the cream cheese and peanut butter together until smooth.
- Mix in powdered sugar and vanilla extract.
- Gently fold in whipped cream until the mixture is light and fluffy.
- Assemble the Pie:
- Spoon the cheesecake filling into the cooled cookie crust and spread evenly.
- Top with additional M&Ms, mini chocolate chips, and drizzle with melted chocolate if desired.
- Chill and Serve:
- Cover and refrigerate for at least 4 hours, or until set.
- Slice and enjoy!
Notes
- For a gluten-free version, use gluten-free flour and certified gluten-free mix-ins.
- To save time, substitute the homemade cookie crust with a store-bought crust.
- Add your favorite mix-ins like Reese’s Pieces, chopped candy bars, or white chocolate chips for variety.
- Prep Time: 25 minutes
- Cook Time: 20 minutes
- Category: Dessert
- Method: Baking and Chilling
- Cuisine: American

